 |
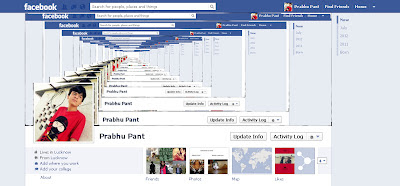
| Wanna create cover like this
|
Though they are not 3D facebook covers, but I like to call them 3D Facebook Covers. You can also save yourself a trouble of creating this. Just like TechBiscuits Facebook Page and you will get a 3D cover (leave comment in this post or message Tech Biscuits if you want a 3D cover). So now to create them, follow these steps (in this tutorial, I am going to show a three layer cover. You can create the above cover by creating several layers.):
- First of all you are required to take screenshot of you
facebook profile page. Make sure that all the ads are hidden. To take
screenshot, open you FB profile page and press Print Screen.
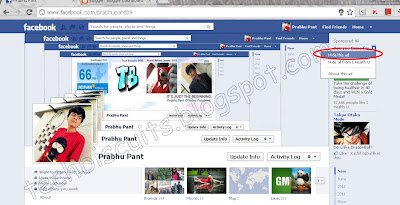 |
| Closing the ads. After Closing, refresh this page. |
- Now go to Photoshop. Press Ctrl+N to open a new blank
workarea. Paste the screenshot in this
box.
- Now you need to erase the portion where your cover photo is
displayed. You can use eraser or rectangular marquee tool. After erasing, make a copy of that image.
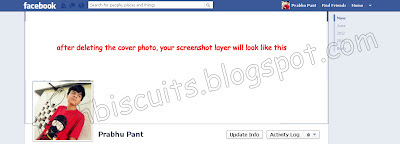 |
| After Erasing the cover photo area |
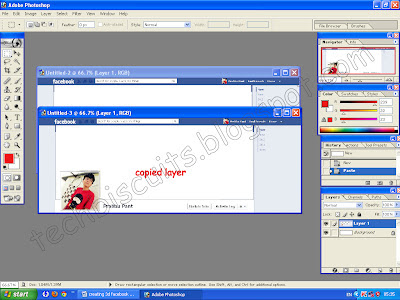 |
| Making Copy of the base image |
- As you can see, the so called ‘3D’ look is on the cover photo
area and the copied image (which you have created in the end of step 3) is
smaller than the base image. So you are now required to reduce the size of the
copied image by 197 pixels. Go to Image-> Image size and reduce the size of
the copied image by 197. Make sure that the Constrain Proportion box is ticked.
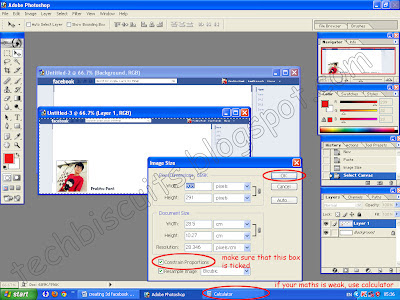 |
| Adjusting the layer's size |
- Now place the copied image in the box of base image. Make sure that the layers are adjusted in increasing order from the top (see the small box in the bottom right corner of the image below.) You can adjust the layers by simply drag and drop.
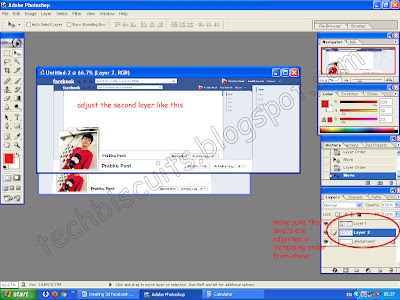 |
| Adjusting layers |
- After the layers are adjusted, adjust layer 2 in layer 1 as given in the image.
The video of this How-To tutorial will be uploaded soon, so stay tuned for updates.


